Enforted - Handling game state with Aurelia Store
This is the first article of the Enforted series, which is going to introduce you to how the game state is handled by using the Aurelia Store plugin. To see the other articles, hop over to the intro’s overview.
The whole world - of Enforted - in a single object
Before we dive into the topic lets have again a quick look at the games’ layout, shall we?
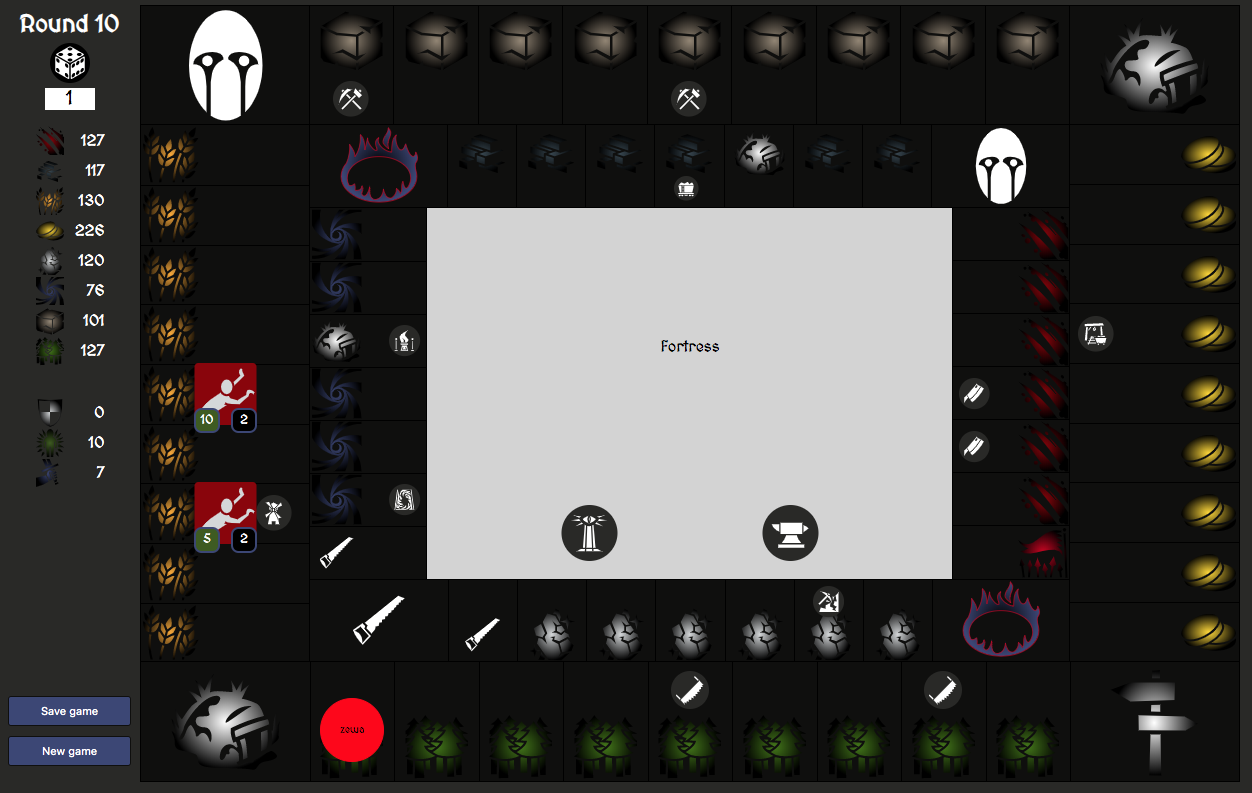
On a quick look, we can see a lot of individual elements such as a tile, buildings, monsters and the player character, the lefthand-side overview panel as well as the central fortress. They’re all stored in individual entities and rendered using straight forward Aurelia data bindings.
Now in a classic MVVM approach, we’d start of creating one or multiple services to host that data. We could start with a BoardService to hold the tiles and buildings, a GameService to keep track of the player’s character and monsters. Last but not least a ResourceService could be the place to store information about how many resources and stats are left. And that would be a fine approach, but with a small issue. I guess you’ve noticed the sad faces, e.g at the upper left of the outer lane. Those are so-called tragedy-tiles that will introduce a random tragic event. By stepping on one of those you’ll see something like in the following screenshot.
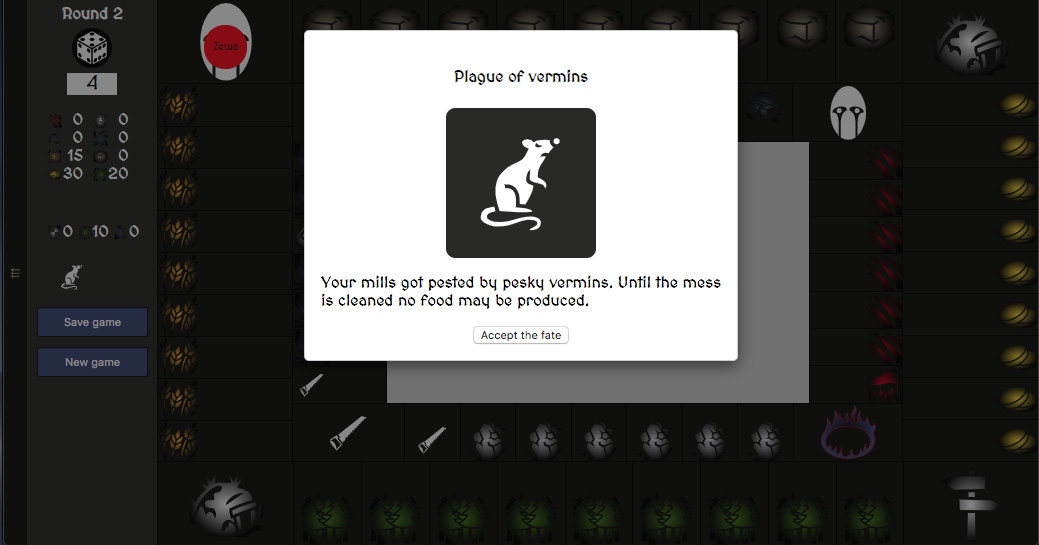
By reading the tragic message, we can infer that our mills - which are tile buildings for the food resource - are going to be set offline for the current round and won’t produce additional food resources. So once we roll our way to the next round, passing the start tile, at this moment we’d need a handle of all the three above mentioned services, so that we can appropriately adapt the new games state. That means three dependencies injected, a bunch of modified arrays/objects and code to verify that setting those new values does not override any previous action.
Now, what if instead, we could express the whole game in a single object? That might look something along these lines:
1 | export interface State { |
Going further, every dice roll would now create a new unique state of your game, which can be again represented with a modified state object. And if you think about it, essentially the whole game can be expressed as a series of those individual states. That is exactly where the Aurelia Store plugin comes into action.
Structuring the project
Since Enforted does not rely on any sort of backend, it’s pretty straight forward to define the initial layout by using the initial state. If you head over here, you’ll find exactly that. Essentially the player position, starting resources/stats and initial tiles get populated with their types and placement, which also allows customizing the board’s layout. In the code listing below you can see how those 72 fields are placed and initialized.
1 | { |
I like to keep everything related to state management in a folder store so the state interface and initial state, therefore, are located in /src/store/state.ts. All actions are located in /src/store/actions. Now here might others say to treat actions like spec files and collocate them with the feature they’re related to. I tend to believe though that actions rarely are used in a single feature but across the app, which is why organizing them by type makes more sense for me. This is a personal preference though and in no way meant as a must.
Now that we know where they are located, let’s see how actions get registered. The start-screen component makes use of two custom actions which set the initial players position as well as let the game start. Since these actions are of primary interest for this component they get registered in this constructor.
While at it, let’s look at the start method of the component. You’ll notice the use of the stores piped dispatch feature, which essentially will pump multiple actions in one state change. The benefit with this approach is that you’ll end up with just one new state while all actions are applied at once, thus no unnecessary re-rendering is triggered. Moreover, you’ll see the au.setRoot method call which is the cheap alternative to using the full-blown Aurelia Router.
1 | export class StartScreen { |
The mother of actions: the dice roll
Amongst all those actions, rollDice is certainly one of most interest. It’s not only responsible for the player’s advancement on the board but also how monsters progress and fight, active tragedy results get applied as well as resource harvesting and stats calculations. Doing all of that in one action is pretty much overkill and asks for better separation of concerns. Knowing that actions are nothing else than pure functions, we can make use of their composability.
Let’s look at the following example quickly:
1 | interface State { |
Calling the above actions individually would allow us to update the current state one by one to get the resulting:
1 | store.dispatch(sayHelloTo, "world"); |
As we learned before though, that would require two states to be generated and create unnecessary intermediate steps. We could also pipe multiple actions store.pipe(sayHelloTo, "world").pipe(fooIs).dispatch() to get the same effect with one iteration. But we could very easily also create a new function which just simply makes use of the previous two.
1 | function helloAndFoo(state: State, who: string): State { |
The benefit with later though is that you could also rewrite the action to make use of foos result as input for hello, which wouldn’t be possible with the piped approach.
1 | function helloToFoo(state: State): State { |
And exactly that is what the roll dice action makes use of. Of course, we don’t need to always merge the full state in function calls but can also use individual parts of the sub-states. So the following is the result of the roll dice action. I’ll annotate every step inside the listing with comments.
1 | // start with the harvesting state of fortress buildings |
With this approach, you can mix and match your resulting state, based on different sub-states, while still only emitting one single new state. That is especially important since we want to have easier means to time travel through our dice rolls using the Redux DevTools, as explained a bit later.
Persisting and rehydrating the game state
It was already mentioned that Enforted is a pure client-side game, without the need for any kind of backend. While this has advantages like being a great target for an offline PWA, it also has an immediate downside. There is no session or game state saving and persisting. To overcome this issue, we can make use of the browsers local storage. Fortunately, the Aurelia Store plugin comes with a nifty helper out of the box.
In the constructor of app.ts all the magic happens, as depicted in the following code listing. First, we’ll create a subscription after the first emitted state, to avoid the initial state propagation, and subscribe exactly for one iteration. We’ll then register the stores localStorageMiddleware and place it after the processing queue, by making use of a custom storage key. This middleware makes sure to persist the emitted state in the local storage, whenever a new action is emitted. And this is exactly the reason why we need to ditch the initial stream item as we’d otherwise immediately persist the original initial state, thus auto-negating the persisting feature.
After the action registrations are done we can safely dispatch rehydrateFromLocalStorage to load the persisted state into the store.
1 | constructor( |
And that’s all that’s needed to create an auto-save behavior for the game. Now we’re not done yet here, as if you remember, the game typically starts with a start-screen first, asking for the player’s name. When we re-hydrate an already saved game state though, we’d like to ditch this and go straight away to the game board.
Remember when we said that store actions are just pure functions which you can compose? Well, we can also use the pre-made rehydrateFromLocalStorage to get hold of the state before even launching the game inside the main.ts file. Inside the function configure, we’ll grab the persisted state - note that we can pass an empty object as the state since we’re not interested in the usual state emitting behavior - and use that to decide where the root of our app is going to be.
1 | const storage = rehydrateFromLocalStorage({}, LOCALSTORAGE_SAVE_KEY) as State; |
Cheating like a pro with Redux DevTools
Sometimes pictures can describe more than 1000 words, and now just imagine multiple of those in high-frame rates ;) So instead of too much talking, just take a look at the video below, to get an idea how you can use the Redux DevTools extension to undo dice rolls and go a different path. It’s a nifty feature, especially during development and a manual exploratory phase.
Conclusion
As mentioned in the intro, this is the first article of the Enforted series and I hope you enjoyed reading so far. Working with the Aurelia Store plugin is a joy and you should give it a try on your next fun project. Make sure to let me know how it worked out or any other questions you have about this article in the comments below.